Apr 2, 2019
Boat Lift Accessories
Boat lift accessories relieve a lot of stress and work. You don’t have to worry about the hull and motor getting fouled after sitting in the water for too long. Think of the time and work you’ll save by not having to put your boat back on the trailer every time you use it. It also relieves your stress during a storm.
Life is just better when you’ve got a boat lift with the right accessories to protect your boat. Accessories for your boat lift include things like solar systems and wireless remote controlled lift motors or a simple canopy.
Here’s a summary of the most popular boat lift accessories that we recommend for your lift:
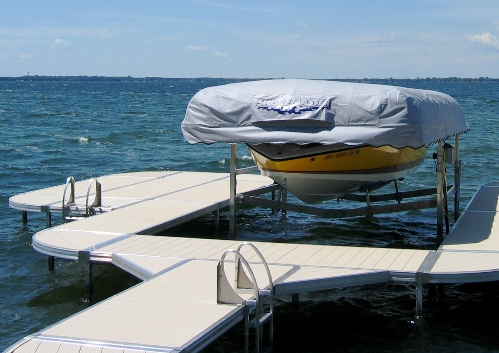
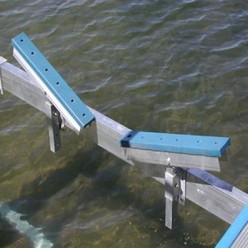
Guide-Ons
Full-Length Guides
Guide-ons make it easier to get the boat on the lift and keep both the boat and lift from sustaining damage in the process.
They come in two basic configurations including:
Vertical PVC guide-ons which consist simply of vertical PVC or foam posts, often covered by fabric. As the name implies they guide boats to help you get your boat onto the lift correctly.
Much more popular are the full-length guide-on systems. Full-Length guide-ons consist of a pair of wood or aluminum guides that mount near the sides of the boat rack. They can adjust both horizontally and vertically for a perfect fit to your boat. They are a physical aid for centering and loading your boat onto the lift.
The guide-ons come carpeted or with a vinyl covering. Vinyl covered guides greatly reduce the maintenance of the guides and are preferred by most boaters.
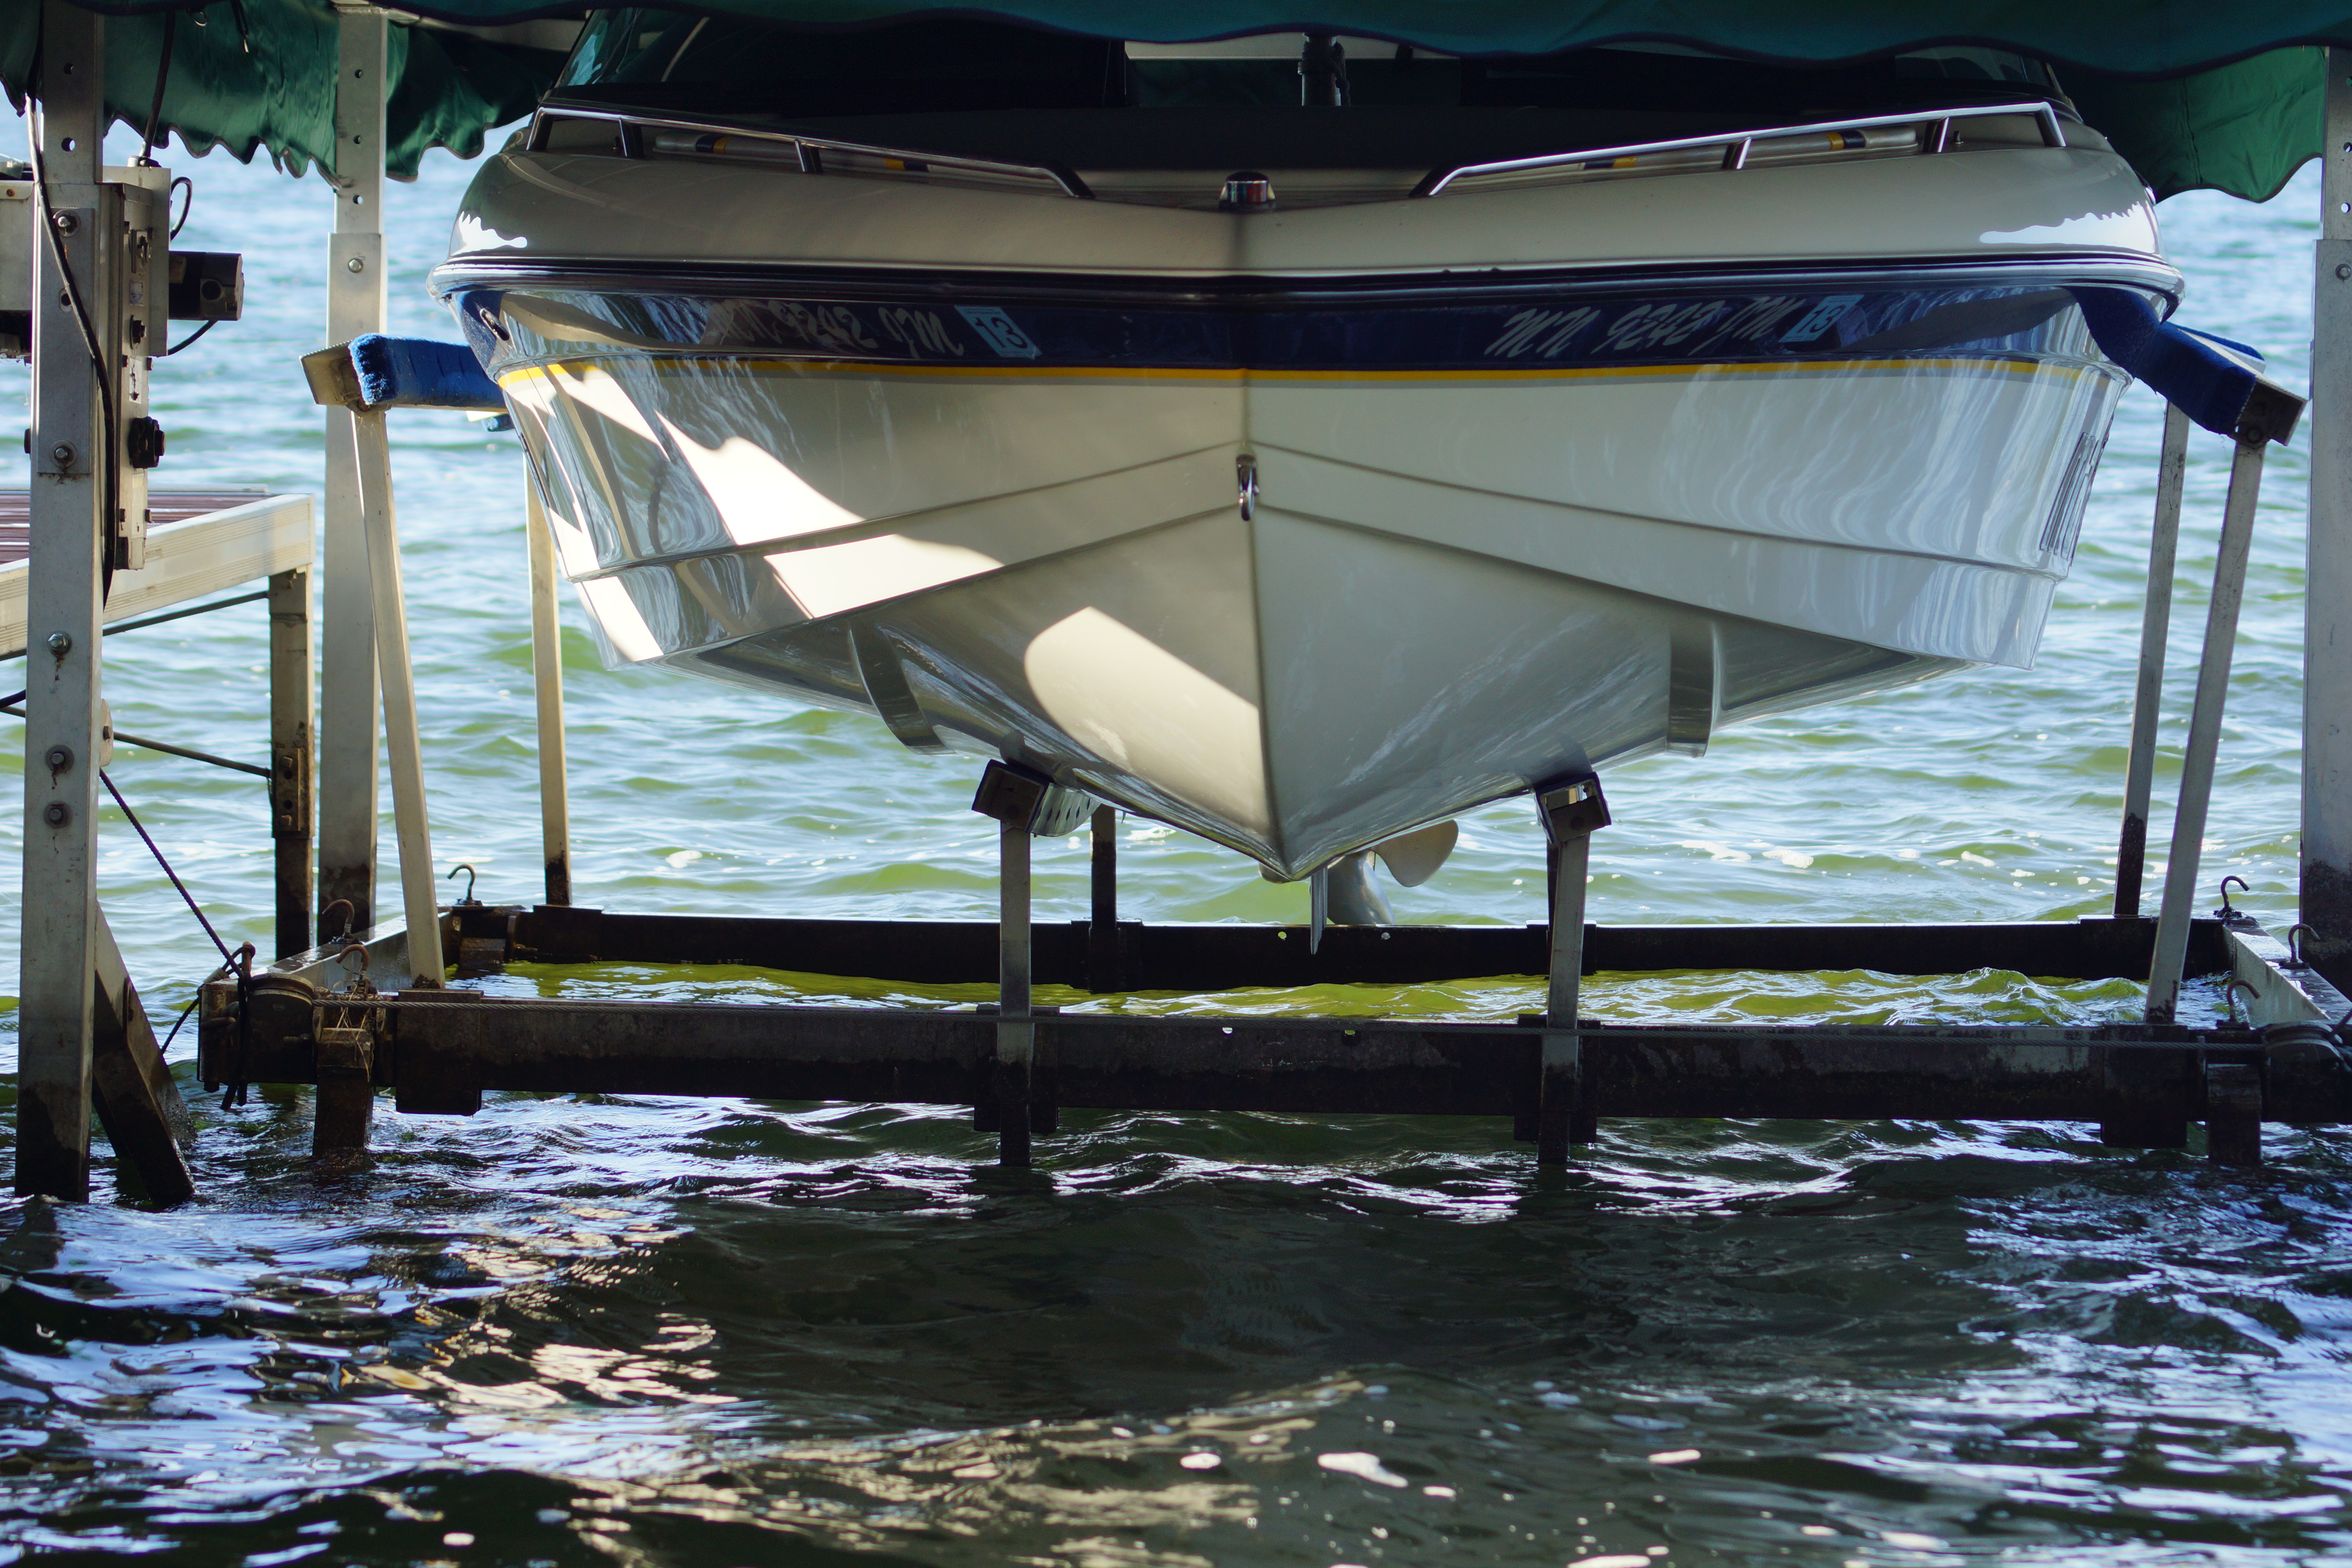
Bow Guide/Stops
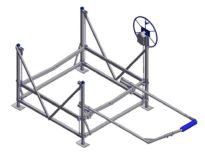
ShoreMaster Bow Guide Schematic
Bow Guide/Stops are a bow-shaped beam at the front of the lift. They keep you from overrunning the boat lift. They ensure proper positioning without effort. It prevents the boat from being pushed too far into the lift by the waves. A properly positioned boat helps reduce the strain on the cables by applying equal weight to all the cables. This is crucial to the life of the cables.
Pontoon bunks
Most Pontoon bunks come in two styles:
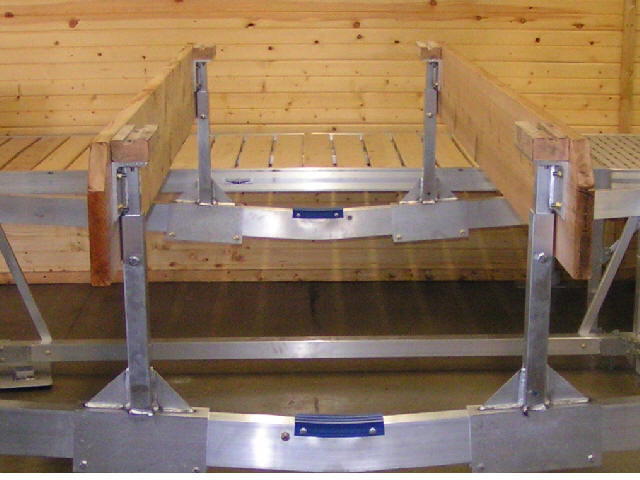
Pontoon deck support
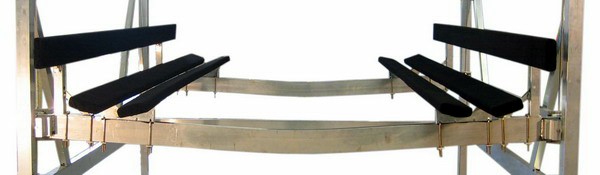
Pontoon Tube Supports
As the names imply the tube supports sit under the tubes and the deck support is under the deck. Opinions differ on which one is better to use. It all comes down to personal choice.
Solar Panel Systems
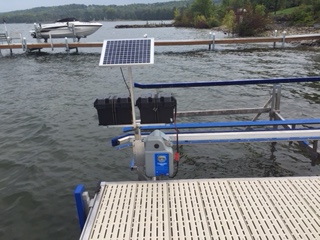
24 V Solar Panel arrangement
Your boat lift may include various systems that run off of electricity. This includes the boat, a lift motor or lighting. We can set up a solar charging system to charge your boat battery as well
as an electric lift motor.
A solar system consists of a solar panel which can attach to the boat lift or battery box. The kit will charge either a battery in a battery tray, or directly charge the battery in your PWC personal watercraft or boat lift. We size the panels and batteries to match your needs. Install a solar charging system, and you can keep your 12v or 24V batteries or personal watercraft motor charged all summer with no hassle.
Floodlights
Ever tried to get started early in the morning or return late at night? Maybe it’s an early morning trip or coming in late at night. It’s always best to be able to see what you are doing.
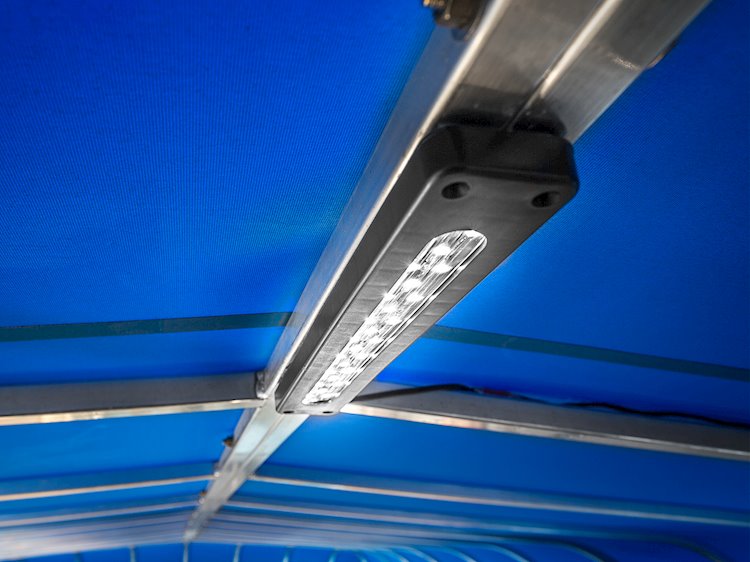
Canopy lights
Maybe it’s making sure everything is battened down during a storm. Sometimes, you have to raise or lower your boat while it’s dark. Finally, it could simply be lights to allow you to see your lift from afar. Having lights can be a lifesaver.
Install an LED light system to provide lighting for your dock and boat lift. Hint: Place a red and green light at the end of your dock, so you know what side you are approaching in the dark. Do you need a light to safely board or exit your boat? These benefits can all be integrated into an electrical system of your boat lift. You can get the power from your solar panel system. Use a wireless remote to turn the lights on and off.
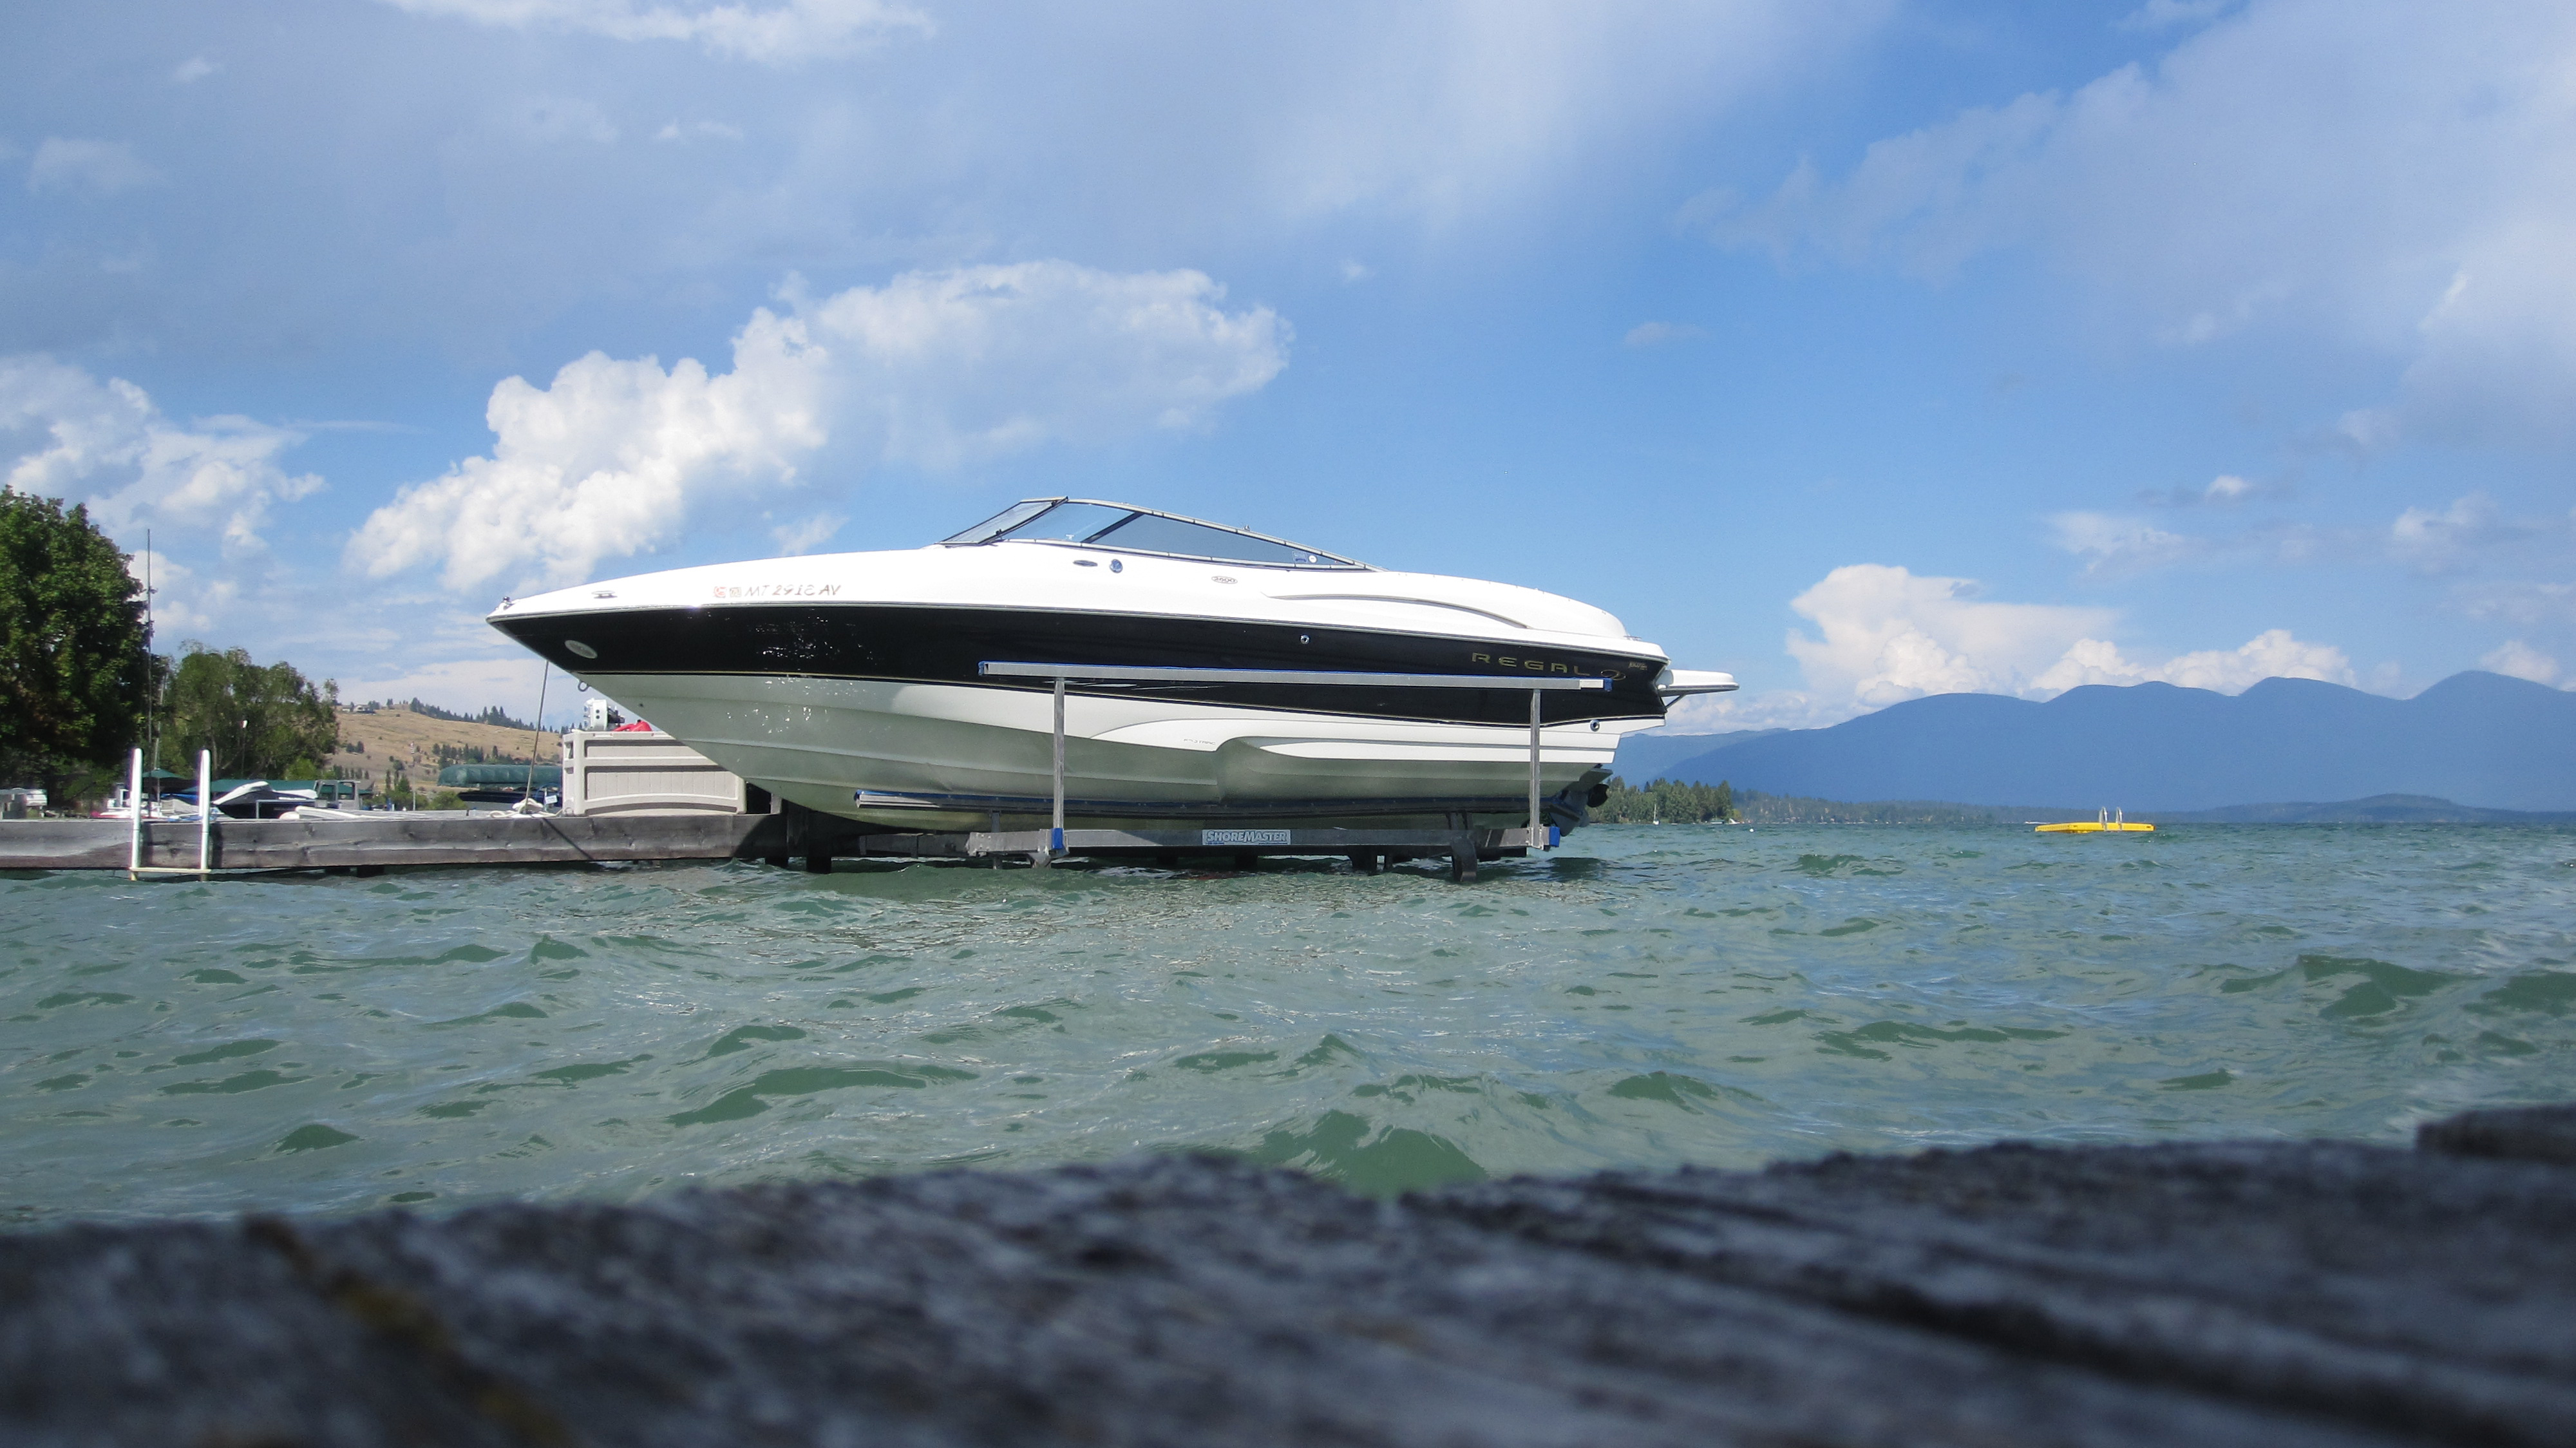
Supports for a boat
Cradles and bunks for your lift support your boat on the lift safely. There a whole range of different types of hull supports you can install on your boat lift to get that perfect fit.
ShoreMaster Cradles
These come in several categories:
Cradles are pivoting pads that stabilize and support the hull of your boat. Today, these are seldom used. People prefer the use of bunks which distribute the weight over a large area.
Full-length Bunks and Guide – on
Full-length bunks provide maximum support and stability. These aluminum extrusions will contour to your watercraft and are
covered in vinyl which resists the adhesion of sand and debris. They can be offset toward your pier for easier access as well.
be careful when offset
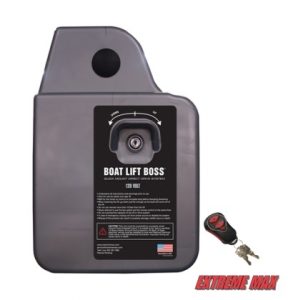
Lift Boss Motor
Lift Boss Motor
A boat lift motor is a popular accessory when you get tired of trying to raise your boat by hand. You’ll probably get one because your better half or the kids have difficulty turning the large wheel. No one has ever complained about having a motor on the lift. They only wish that they had done it earlier.
See this link for more information.
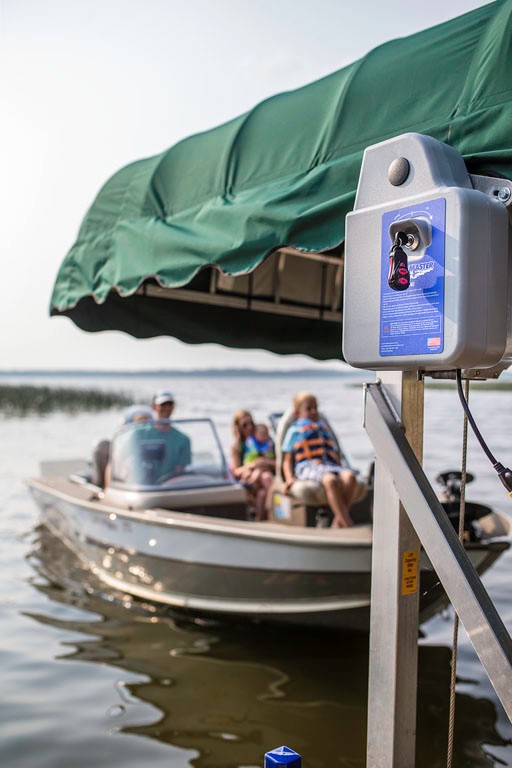
Wireless Remote
Remote Control
Once you’ve started to accumulate accessories for your pier and boat lift, you may want a more convenient way to control it all. That’s where a wireless remote comes in.
If you have an electric winch operated boat lift, you can get a wireless remote which lets you raise or lower your boat from up to 300 feet away. The same remote can additionally operate
your LED floodlight system. This means you can turn on the lights and lower your boat into the water before even setting foot on the dock.
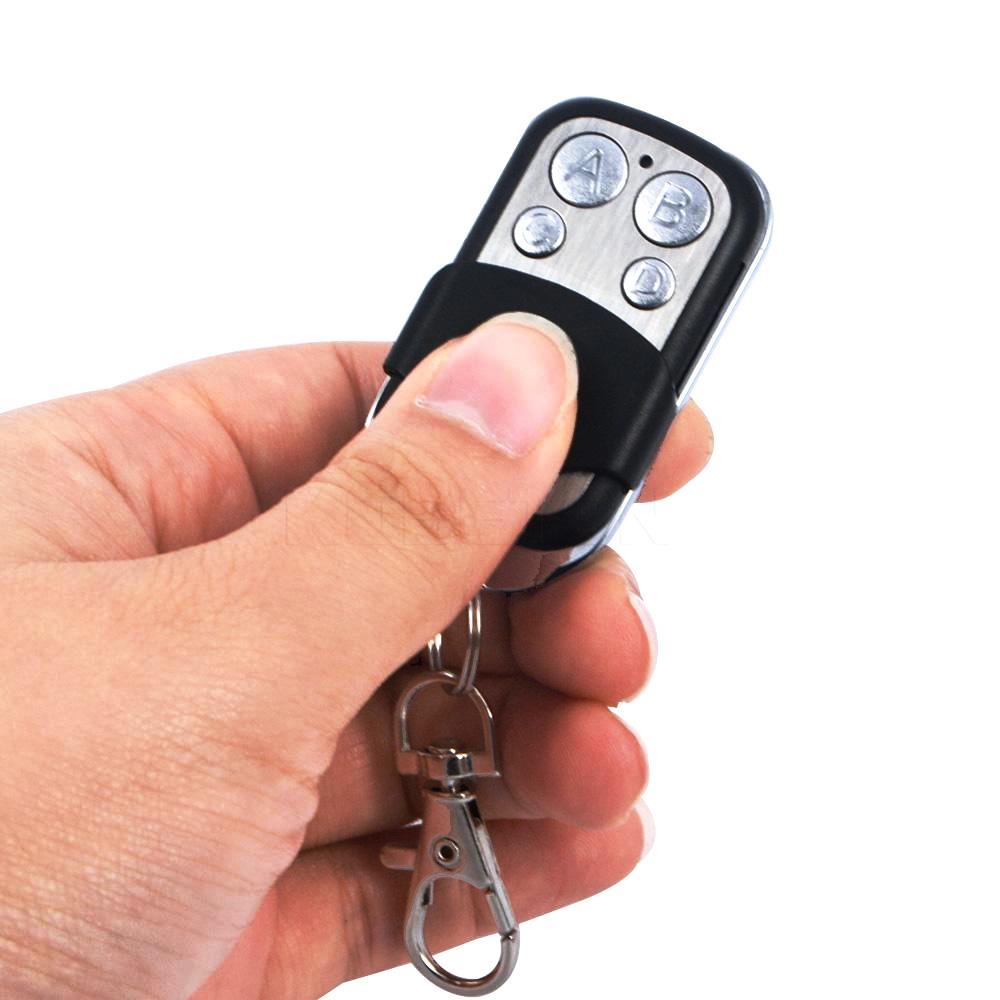
If that’s not convenient enough, you can even put the key fob remote on your keychain, so it’s always on hand. If you can open your garage and unlock and start your car with a key fob, why not make it just as easy for your boat?
See more lift accessories at this link: Shoremaster
Call PWS for Boat Lift Accessories and Maintenance
Depending on what sort of accessories you’re interested in, such as the bunks and cradles, it’s probably a good idea to get professional help choosing and installing these accessories. PWS is a team of professionals, and we’re well-equipped to handle any maintenance you need for your boat lift in the Door County area.
Give us a call today and let’s discuss how we can make your boat lift and pier as convenient to use as possible!
PWS is located at 7325 St. Hwy 57. That’s 1 mile North of County MM (Hwy 42) and 3 miles South of Sturgeon Bay at the Idlewild Road intersection. Our staff is here year-round to assist you.
Mar 5, 2019
Power Options for Boat Lift Motors
Boat lift Motors are covered in this 2 part series. We discuss the different types of operating systems for boat lift motors. Installing a boat lift motor makes your life so much easier. If you can operate a garage door opener, you can run a boat lift motor.
Lift Boss
You have three choices to consider for powering a boat lift motor.
- An A.C. operated system;
- A 12V system; Or
- A 24V system.
PWS does not usually recommend an A.C. powered system. Why? It usually means running an extension cord to the motor. Your safety and the safety of the people near you are our primary concern.
Using an A.C. operated lift motor means the extension cord(s) and the connections will be exposed to the elements. These include – Rain, morning dew, splashing from waves, and the list goes on. As a result, there is a potential to expose people to ESD. For a further explanation read this article.
You could be endangering children (or grandchildren) and even your neighbors to electrical shocks. ESD can be deadly and not only threatens swimmers but the people who attempt to rescue them.
Beside safety reasons what other dangers are there?
First, some background info. The smaller the Gauge (Ga.) size, the heavier the wire is. Thus, a 12 gauge wire has a “heavier” wire than an 18 Ga. Typical household extension cords – those brown or white cords – are 18 – 20 Guage (Ga). The wiring in your house is a 14 Ga. 12 Ga. is used in kitchens and bathrooms due to higher amperage requirements. A smaller diameter wire will have a higher resistance to current flow. Thus, more heat is generated in the wire and connections. You want the least amount of heat as possible.
What is Voltage Drop?
The electrical source you use usually will be a circuit run underground or along poles to a power box near the water. At this point, you probably are thinking – “So what, I’ll just run an extension cord to the motor.” On the bay of Green Bay and the Door County peninsula, in particular, you may be looking at the need for a 100’-200’ extension cord. This likely means a second extension cord and more voltage drop. This will get the power across the shoreline to the location of the motor. This presents some problems.
In reality, the longer the extension cord is, the more “voltage drop” will occur. Think of it this way – to turn that motor you need a specific voltage (110V) and amperage. If you experience a voltage drop due to the length of the extension cord, it will require more amperage or current flow make up for the loss in voltage to operate that motor. This situation causes wires to heat up and motors to run hotter. An overheated motor will trip the breakers and damage the motor.
If you’re starting at 110 volts and the voltage drops 3%, it won’t matter to a small appliance or light bulb that the voltage is now 117 volts. However, if you plug in a 100-foot extension cord, the voltage will drop about 6 percent to 104 volts. The motor will run hotter.
Motors generally need heavier gauge wires, in this case, 12 Ga. You would not plug a window air conditioner into those “brown” 18-20 Ga. extensions cord you find at the supermarket. Even a short 4 ft cord like that will almost instantly trip a breaker – IF you are lucky. A fire will occur if you are not so fortunate.
Motors and Extension Cords do not mix well.
Voltage drops can cause loss of efficiency, and this will mean a shorter life span for the motor. It is essential to use the right gauge of wire when running wires for a long distance and keep the cords as short as possible with as few connections as possible.
Electrical cord Guidelines
The best practice is don’t use an extension cord if you don’t have to. Since this isn’t always practical, follow these guidelines for using extension cords with motors to minimize voltage drop:
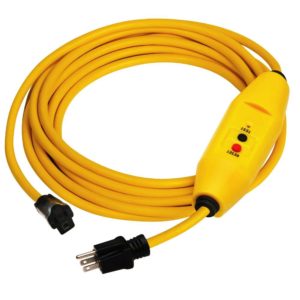
Electrical cord with GFCI device
- Use a GFCIs, or Ground Fault Circuit Interrupters to disconnect power if a potentially dangerous situation occurs. A GFCI interpreter will instantly respond, preventing possible electrocution-related accidents.
- Always use the shortest extension cord possible.
- Use only one cord (there is a voltage drop across the connectors also)
- Use the heaviest Ga. possible – usually a 12 Ga. wire.
- Route extension cords safely and securely. Never place them where they will be damaged or drop into the water.
- If more than one cord is required, use the same on both cords
- Use only extension cords rated for outdoor UV resistance.
- Protect the connectors from the water.
- Do not use damaged cords. Watch out for electrical tape on extension cords.
These are important safety considerations. Choosing the right wire for the job is a critical safety measure.
The best practice is don’t use an extension cord if you don’t have to.
About 50 people die, and 270 people are injured each year when extension cords are strung together.
In part two of this series, we will discuss the two variations for D.C. motors.
Do you have a friend that may be interested in this information? Please share a link to this page with them.
Need Help Selecting a Boat Lift Motor?
PWS is located at 7325 St. Hwy 57. That’s 1 mile North of County MM (Hwy 42) and 3 miles South of Sturgeon Bay at the Idlewild Road intersection.
Our staff is here year-round to assist you.
Feb 26, 2019
Boat Lift Calculations
Boat lift calculations are explained in Part 4 of this series.
Have a new boat and don’t know what boat lift size you need? We will outline the general procedure for determining the proper boat lift size to use. Much of the information we ask for can be taken from the boat registration. To give you an accurate estimate we need as much information as possible.
Finding the Overall Weight
Where can the specifications for your boat be found?
The specifications may be provided in a brochure, on a website or a specification sheet. If you can’t find them, among other resources, try using the online NADA guides www.nadaguides.com/Boats/. Go to the website, and look for “specifications” for your model and year.
Before giving you a final recommendation on lift capacities, we usually check more than one source. We always use the higher of the two numbers if there is a difference.
For this post, we went to nadaguides.com/Boats/2013/Chaparral-Boats/H2O-19-SPORT__/32036233. We selected the 2013 Chaparral Boats H2O 19 SPORT.
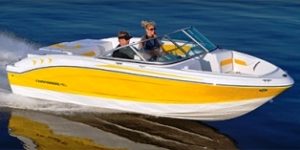
2013 Chaparral Boats H2O 19 SPORT.
The following (edited) information comes from that website.
Suncoast model weight includes the weight of the outboard motor.
[As you see below, there are (10) different engine sizes available. That means (10) different weights. Thre information is correct if they used the original motor from the manufacturer. It is best to check this information against your actual motor(s).]
115-135 HP (3.0L)
136-200 HP (3.0L – 4.3L) (included)
201-230 HP (4.3L – 5.0L ##)
231-265 HP (5.0L – 5.7L ##)
266-300 HP (5.7L #)
301-350 HP (5.7L – 8.1L ##)
351-400 HP (5.7L – 8.1L ##)
401-425 HP (8.1L ##)
426-470 HP (8.1L ##)
471-500 HP (8.1L ##)
Engine selection Key – (#) For 1993-1997 model years include 7.4L (300 HP) Mercruiser engine.
(##) Use your engine’s horsepower rating.
Under specifications, you will also find: [Condensed for our purposes]
Horsepower (bhp) 135
Length (ft-in / m) 19′ 4” / 5.9
Beam (in / m) 90 / 2.3
Dry Weight (lbs / kg) 2540 / 1152
Fuel Capacity (gal / L) 30 / 114
Please note, the dry weight provided by the manufacturer often does not account for the weight of outboard motors. Be sure you know what the number represents.
If, at any time, you would rather have PWS do the calculations for you, contact us with this information:
Model year;
Brand;
Model; and
Length of your boat.
What other items are needed for boat lift calculations?
You now have the manufacturers’ boat weight. We still need to account for:
- The weight of the fuel;
- All gear on the boat;
- Water storage;
- Non-factory additions.
Keep in mind, you will be lifting all of that weight each time your boat is raised out of the water.
IMPORTANT – EVERY boat lift manufacturer will tell you that lifts are NOT designed to transport people.
In real life, we also realize that the elderly or children often stay in the boat until it is raised. We do NOT recommend this, and you take responsibility for this action.
However, if you must take this action – allow for that added weight in your calculations. Remember, the lift can only handle it’s rated capacity. If you transport people, you are also assuming that the cables are at 100% capacity with no rust or frays. See also – https://wisconsinpws.com/lift-cable-inspection-replacement/
Now let’s look at the information provided above:
Gasoline weighs approximately 6 -7 # per gallon. Multiply this number times the capacity of your fuel tank to arrive at the weight of a full tank of gas.
Water weighs approximately 8 lbs. per gallon. Now check the capacity of all freshwater tanks, wastewater tanks and don’t forget any live wells.
Non-factory modifications – These include wakeboard towers, bimini tops, extra seating, generators, coolers, and swim platforms. It all adds up.
Gear – This include skis, wakeboards, scuba equipment, etc.
Now, add these numbers to your boat weight.
Think you’re done? Not quite yet!
Now add a “margin of safety.” This is usually between 10% and 20%. At this point, we select the next higher capacity for your lift. Why the need for all this? Here’s a simple example of why we do this.
A man picks up a ball. For our purposes, let’s say it weighs ¼ #. This presents no problem.
Next, the same ball is coming towards him at 90 mph. It hits him. It hits him. Do you think the ball “feels like” it weighs only 1/4 #? Obviously, the moving object will have the effect of “more weight’ even though it still weighs just ounces.
Why the comparison? Many times in a storm, the waves will wash against the bottom of a boat. In severe storms, the boat may actually bounce up and down on the lift as the wave rolls across the bottom. Now you have a boat weighing 2,500 – 3,200 pounds bouncing up and down. The added “weight” of the boat at this time may result in a cable breaking. This situation is especially true if the lift was not properly sized originally or the cables are not in good shape. In severe cases, the boat may be washed off the lift completely. A future post will address the insurance issue – watch for it.
Will the lift be able to take the “shock” of that bouncing? That’s why we go to the next size up. This is a common cause of cable failure. These “shocks” could cause a cable to break if they have rust or frayed strands. For more information SEE https://wisconsinpws.com/wp-admin/post.php?post=404&action=edit
The initial extra fee is small in comparison to the cost of damage to the lift or your boat. You could lose your boat & motor completely.
Do I need more Information?
What other things adversely impact a boat lift? What if your boat is in a downpour without a canopy or cover? Did you remove the drain plug while the boat is on the lift? (Don’t forget to replace it before you lower the boat).
What if you don’t know that the bilge pump is malfunctioning. These things may result in lift failure. A safety margin and a few extra dollars now may save you a lot of $$$$ later.
The point is that little things can add up and it is best to err on the side of caution.
What’s next?
The next step is to look at your boat WIDTH. In our example, we have a 90” width.
Does this mean a 96” width lift will work for you? Not even on a calm day!
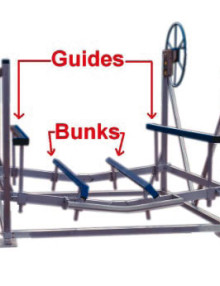
Bunks & Guide options
We equip our boat lifts with guides to keep you centered on the bunks as shown in this example. The guides require a minimum of 6” width each – that’s 12” for a total of 102” in this example. Ok, so a 108” lift will work – right? Wrong!
If you have deep water, you can maintain control of your boat on a calm day. You might be able to get by with a 108” wide lift. However, what if the wind is blowing from the back or one side? Can you control your boat under with only 6” of “spare room”?
In shallow water, you have to “trim” (raise) the motor. Shallow water is the usual situation on the bay of Green Bay. When you trim your motor, you lose control of the direction and speed you are entering the lift. Any decent wave will push you to one side. How many days are absolutely calm?
We are going to cover this situation in more depth in an upcoming post but for now, follow our recommendation for a 120” width. This width will do three things for you:
1. Allow the “guides” to place you properly on the lift;
2. Reduce the risk of damage to your boat and dock; and
3. Give you a higher resale value.
We never have a complaint about the lift being too wide
IS YOUR BOAT CENTERED?
Although not part of the equation – is your boat centered width-wise? Failure to do so will put added strain on the cables on one side. The lift ratings are based on equal weight distribution on all of the cables.
Don’t forget – you need to correctly place your boat “forward” on the lift also. If it is too far forward or back, you have too much weight on the front or rear cables. You risk breaking a cable. The weight has to be distributed equally on the front and rear cables. In a storm, this can also be a factor in your boat being washed off the lift despite being in it’s highest position.
What happens when the boat is too far forward or backward? For more information See https://wisconsinpws.com/wp-admin/post.php?post=1944&action=edit
After all this, you now have the proper lift capacity and the correct width. That about sums it up.
By the way – What would be our recommendation for this example – a ShoreMaster vertical boat lift – SM4010 DVS. (4,000# capacity, 120” wide).
Happy Boating!
Need Help Selecting a Boat Lift For Your Home or Cottage?
Do you have a friend that may be interested in this information? Please share a link to this page with them.
PWS is located at 7325 St. Hwy 57. That’s 1 mile North of County MM (Hwy 42) and 3 miles South of Sturgeon Bay at the Idlewild Road intersection.
Our staff is here year-round to assist you.