Nov 7, 2017
Remove the Jet Ski Lift from the water
Jet ski lifts need to be removed from the water for the winter in Northern climates to prevent major damage.
Dock-mounted lifts that rotate over the dock should be stored over the dock and secured in case of storms. The Jet ski itself should NEVER be stored on the lift for the winter. Ice accumulations can severely damage the lift. Non-rotating or free standing lifts need to be removed from the water
Jet Ski Lifts- simple yearly Maintenance
Jet ski lifts require simple winterizing maintenance at the end of the boating season in order to prolong it’s life.
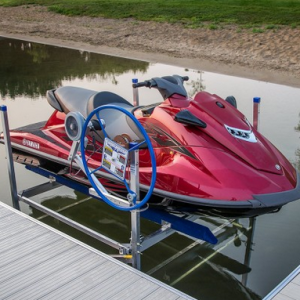
ShoreMaster Cantilever Jet Ski Lift
Here are some things you should do:
- Inspect the jet ski lift at the end of the season for worn parts, frayed cables (extremely important), loose bolts, etc
- For electric powered jet ski lifts, remove the motor and store it inside of a building or relieve the tension on the bungee cords, if so equipped.
- If the water will be freezing during the winter, move the lift to dry land
- Check bearings for noise and proper operation
- Make sure there is no vegetation or sand in the rack frames
- Check all pulleys and other wearable parts for damage. On older models, with plastic pulleys, rotate the pulleys by hand to insure none of the pulley edges are broken. In general, these must be replaced.
- Ensure that the lift moves freely up & down without binding or straining. A general rule when lowering the rack is to maintain downward pressure on the rack.
- For electric jet ski lifts, remove the motor and store it out of the weather or, at a minimum, relieve the tension on the bungee cords, if so equipped.
- All cables should have a quick spray of penetrating oil applied to them, including on the cable wrapped around the winch drum. However, DO NOT APPLY any oil inside the winch mechanism itself.
- Is it time to replace the carpet on the lift bunks or should you consider replacing them with maintenance-free vinyl bunks?
When should I consider these adjustments
Fall or early Spring is a good time to order replacement parts for your jet ski lift. Call or email Pier & Waterfront Solutions for replacement parts. When spring arrives the lift manufacturers have very busy shipping schedules and parts can take longer to get.
Be ready for summer fun.

Enjoy the summer on your jet ski
Aug 2, 2017
When Should A Boat Lift Cable Be Replaced?
The proper time to replace a boat lift cable depends on a variety of circumstances:
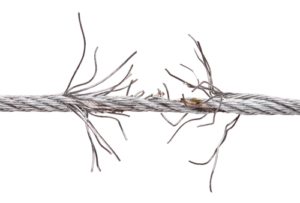
Corroded & Frayed Cable
- How well is it maintained?
- How often is it lubricated?
- What is used to lubricate the cables?
- Is the cable winding properly?
- Was the lift sized properly?
- Is there any visual damage to the cable?
- Are there frayed wires on the cable?
- Is it a galvanized cable or stainless steel?
- Is there corrosion on the cable?
What is the proper lift cable maintenance?
Lift cable replacement depends on a visual inspection of the lift cables to help determine when to replace them. It’s best to inspect it while it is on dry land in order to check all of the key points. Ideally, the lifting platform (or rack) should be in the lowered position. Of course, make sure the lift cable is not allowed to go slack.
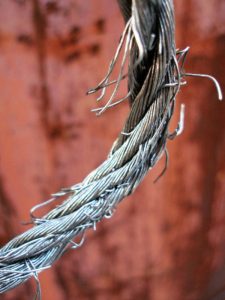
Frayed Lift Cable
Examine the vertical length of the cable for frayed wires especially near the winch. CAUTION – Always wear leather gloves when sliding your hands on the cable. To put it differently, a frayed wire can cause extensive, painful damage to unprotected hands.
The cable is made up of multiple strands of wire and multiple wraps are used to form the overall cable. Excessive fraying or corrosion near the winch is a top signal of damage.
Nothing lasts forever – even boat lift cables
There are two types of cable wear:
- Internal cable abrasion- This occurs whenever strands work against each other under load.
- External abrasion – This also occurs when the cable bends around the winch drum and rubs against the adjoining cable or drum.
How long a lift cable lasts depends on:
- How often it’s used;
- What type of cable it is; and
- The care it receives.
Every time a boat is raised or lowered over a winch drum there is internal wear on the cable. Each strand of wire in the winding is moving at a slightly different speed. Abrasion of the cable strands is the result. When you loose too many strands you lose a lot of strength.
What should be done?
Steel lift cables require a squirt or two of penetrating oil occasionally to reduce the internal friction on the strands and individual wires in the cable. This is particularly important on galvanized cables. Lubrication helps to preserve the galvanized coating and minimizes abrasion between strands. Grease should NEVER be used, as it traps moisture inside the strands. Do not saturate the cable and only use penetrating oil for best results.
Stainless steel lift cable will also benefit from a few squirts of penetrating oil. This should be done in Spring and again in Fall.
Strong indicators that a boat lift cable needs to be replaced:
- Excessive broken strands:
- Kinks:
- Deformities and
- Areas of heavy corrosion.
Corrosion
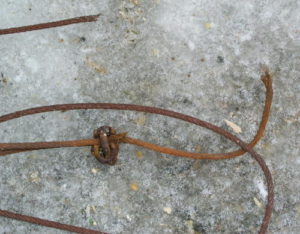
Rusted Lift Cable
Galvanized cables that break tend to show signs of corrosion or rust. Usually this is located near the winch when the rack is in the lowered position. It also can be at the bottom of the cable where it is secured to the frame. Note: do not allow the main cable to go “slack” when lowering the rack.
A slight discoloration indicates that the protective galvanizing coating has been worn away. Concentrations of heavy rust indicate that the steel cable itself has lost considerable strength and should be replaced immediately.
Assuming the cable is well cared for, how long should it last?
Experts say that, to be safe, galvanized cable should be replaced every two years. All things being equal, stainless cable will last longer, up to twice as long.
A point often overlooked – internal abrasion or rust can be hidden and may not show visible damage on the cable. A boat lift cable like this may sometimes fail without prior warning. An improperly positioned boat, shocks from wave action (when bouncing on the lift rack or jamming the rack against the frame may send your boat into the water.
When in doubt, replace the cable; trying to squeeze another year out of a $75 cable isn’t worth the risk of dropping your boat or personal injury.
Remember
Pier & Waterfront Solutions (PWS) specializes in all ShoreMaster docks, lifts and accessories.
Located in the center of Door County at 7325 St Hwy 57, just south of Sturgeon Bay at the intersection of Idlewild Road. Our staff looks forward to serving all of your waterfront needs.
Found this article helpful? Go to “NEWS” on any page of our website for a complete list of articles meant to keep you informed on the latest product information and maintenance issues. Check out our “older entries” also.
The wide variety of articles on dock and boat lifts issues will answer many of your questions. PWS believes that an informed consumer makes better decisions.
Call Jerry at 920-493-4404 or Email Jerry@wisconsinpws.com for more information.
Coming Soon – “The PWS Store” on our website
Feb 24, 2017
What is a Pressure Ridge?
A pressure ridge is the result of a change in temperature which causes the ice to crack and form a floating ice sheet. This formation is usually located a few hundred feet off the shoreline. This is the beginning of a pressure ridge.
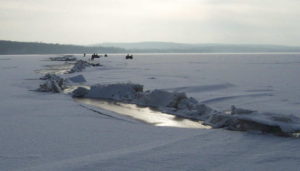
Pressure Ridge
The ice near the shore is anchored securely to the shoreline. The floating ice on the outer side of the crack separates and then is moved back to the joint by the winds. The resulting pressure builds up and crushes the edges into pieces called rubble.
The rubble forms the “Keel” of a ridge, which as the name implies, is below the water line. The loose rubble accumulates and builds up until it reaches the bottom of the water. After reaching the bottom the remaining crumbed ice at the surface begins to move vertically. This forms the “Sail” portion or upper part of the pressure ridge. The “sail” is the part you actually see on the surface of the ice. It can be a foot high or several feet high.
The pressure ridge can form very rapidly especially when the wind direction shifts. Since the rubble below is exposed to non-freezing temperatures, it can melt away.. This will leave a very weak and fluctuating joint at the surface.
What is an Ice Shove?
Ice shoves occur during warmer weather also- normally in late February and into March. They require a steady or gusty, strong wind over a period of time.
The ice shove occurs when strong winds rapidly push free floating ice towards the shore. Strong winds from the same direction over, say, a 12 to 24 hour period, are enough to drive huge areas of ice onshore. As these moving masses of ice move towards the shoreline they will begin piling up when they encounter resistance from the shoreline or other obstacles. The resulting ice shove can reach heights of 50 feet.
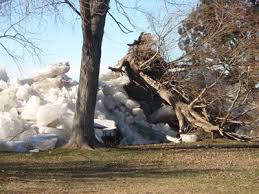
An ice shove has tremendous power and have been known to push houses off their foundations and uproot large trees. Shoreline barriers like trees, seawalls and shallow cliffs are not a challenge for a ice shove. The ice simply piles up as shown above until it flows over the object or crushes it. It will continue on its journey as long as the wind continues to blow. (See the video at the end of this article for a demonstration of an ice shove)
Ice Shoves can affect a small area of shoreline or vast distances depending on the force of the wind and the strength of the ice. At times, one or two properties are affected while the adjoining properties see no movement at all.
What measures can you take to protect your waterfront equipment?
Simple – In the fall move your docks and lifts far enough back that the ice normally will not get to it. In doubt? Watch what your neighbors do. They know how far back to go.
Here’s an example of what PWS has had to do to prevent damage from ice shoves when there is little or no shoreline:
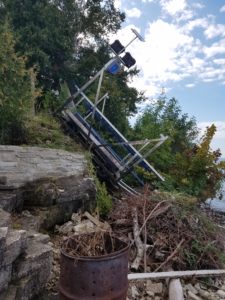
Boat Lift being removed for winter
This lift and accompanying dock had to be raised to the top of a ledge because there was inadequate shoreline available to protect the equipment from any ice movement.
For more information check this video to see an actual ice shove in action: www.youtube.com/watch?v=Pf5pWz7uRt4
Found this article helpful? Call Jerry at 920-493-4404 or Email Jerry@wisconsinpws.com for more information. Also go to “NEWS” on any page of our website for a complete list of articles meant to keep you informed on the latest product information and maintenance issues.


