Jan 5, 2021
Boat Lift Styles
In Wisconsin waters, there are (5) different boat lift styles generally used. The (5) styles include:
- Cantilever,
- Vertical,
- Hydraulic,
- Floating, and
- Elevator boat lifts.
Different conditions require different boat lifts.
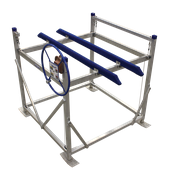
Cantilever Lift
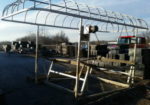
Cantilever Boat Lift Style
If you are on an inland lake or river where the water depth does not fluctuate more than 12″ throughout the boating season and wave action does not exceed 6″, a cantilever lift is generally suitable for you.
Cantilever lifts requires about 12″ of water plus the draft of your boat to operate. The lifting rack requires that depth of water due to the shape of the frames.
At first glance, that seems deep enough for most boats, but you still have to allow enough water above the rack to float your boat.
The real limitation of a cantilever lift is the total lifting height. If a river rises, especially after a heavy rainstorm, a boat can easily float off the lift. The boat is not up high enough to prevent the water from washing it away. Who knows how far it will travel before it hits something?
The normal lifting range is between 40″ and 48″. Remember, the rack starts at 12″ plus the draft of your boat, so you are usually less than 12″ above the water at its highest point.
Vertical Lift
On any large body of water, a vertical lift is the recommended lift for most people. Vertical lifts do a better job of protecting your boat from waves.
Some vertical lifts require about 6″-10″ of water plus the draft of the boat. As an example, ShoreMaster vertical boat lifts require only 6″ of water (plus the draft of your boat). Given the same conditions, you have already gained 6″ with this one feature alone.
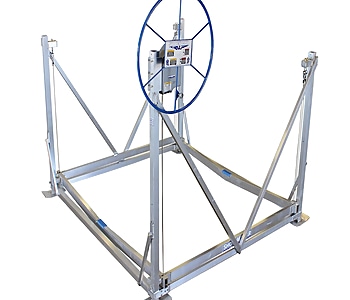
Vertical Boat Lift Style
Now, add the total lifting height of 66″ for a ShoreMaster vertical lift, and you gained a minimum of 18 or more inches of protection vs. a cantilever lift.
Your most significant protection comes from the lifting height. Don’t forget about the strength of the lift frame and the gauge of the material used. ONLY the ShoreMaster boat lift has welded side frames with heavy-duty square or rectangular frames for more strength.
Other brands require several packages of bolts and nuts to assemble the frames. Eventually, the holes for the bolts enlarge, and the frames begin to sway. The solid welded frame is a real advantage at this time. A minimal number of bolts are needed.
Can a lift raise a boat TOO high?
Strange as it may seem, it is possible to go too high. How? When the frames are not strong enough to handle the leverage of the weight from the boat.
At least one brand does lift higher than a ShoreMaster lift, but they failed to use welded frames for the additional strength it needs.
If you can imagine the forces acting against the frames in a storm when you have thousands of pounds suspended in the air with only simple bolts to hold them together. The higher the boat is, the greater the leverage on the frames.
Their leg wall thickness is not heavy enough to handle the forces acting against it. Green Bay produces more than 4′ high waves, and the waves frequently strike against the bottom of a boat, adding to the leverage problems.
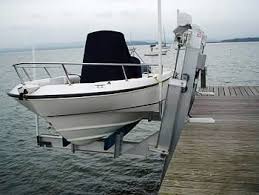
Elevator Boat Lift Style
Elevator Lift
Used with permanent pier installations, Elevator Lifts are a great combination. They raise the boat from the side, making access to the lift very easy.
Narrow channels and areas experiencing large fluctuations in water depth or hurricanes require elevator lifts.
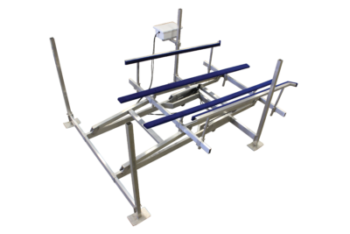
Hydraulic Boat Lifts Style
Hydraulic Boat Lift
A hydraulic lift generally lifts the highest – up to 6′ high in some cases. This height, along with the wide stance of the base, gives excellent protection for your boat. The hydraulic lift handles high waves and water surges during storms also.
These D.C. operated units are:
- Quiet:
- Smooth operating;
- Solar-powered;
- Wireless remote-controlled (There are no wheels to contend with.)
Vertical PWC Boat Lift
Vertical PWC Lift
Jet Ski lifts come in 3 styles: Vertical, Cantilever, and Floating.
The vertical PWC lifts allow you to get into shallow water and raise your boat higher than the cantilever type. They operate in the same fashion as a standard vertical boat lift and provide more protection for your PWC.
The PWC cantilever lift works fine on small lakes and rivers that do not fluctuate in depth or have high waves.
SHOREPORT
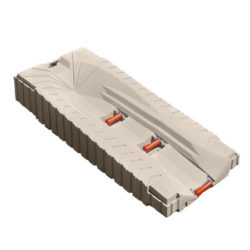
ShorePort PWC Boat Lift Style
The floating lifts (ShorePort) are excellent on rivers that fluctuate a lot in depth or inland lakes. These are very simple to use and require very little water to operate. The floating lift has no maintenance and you simply drive up onto the floating unit. No wheel cranking involved.
Wave action above 12” is not recommended for this type of “lift”. Combine a floating dock with the PWC floating lift and you have the perfect combination for a lake or river that fluctuates during the season but does not have large wave action.
Caution – when using any PWC lift – If you have a sand or small rock bottom near the shore use caution when approaching the lift. Sand and small stones can be sucked into the intake and destroy your motor.
For more information see also: www.wisconsinpws.com/boat-lift-size-correct-one/ and https://wisconsinpws.com/boat-lift-selection/
Where is Pier & Waterfront Solutions?
Located at 7325 St. Hwy 57, it’s 3 miles south of Sturgeon Bay and 1 mile PAST the intersection of Cty MM (heading north). Look on the right at the intersection of Idlewild Road and Hwy 57.
ARE WE OPEN?

Please use face masks
Pier & Waterfront Solutions remains “open” year-round.
The virus continues to spread. PWS is conducting as much business as possible by email, text, or phone.
Site visits continue as usual. When in-person contacts are necessary, we follow “social distancing” guidelines as closely as possible.
Our display yard is OPEN 24-7
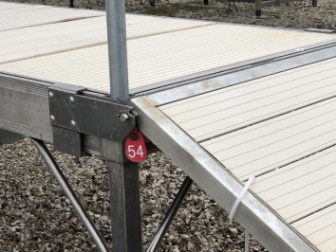
Red Tag
PWS‘s display yard is always open for you to examine at your leisure. All displays available for sale have a numbered, red tag on them. If you want more information or pricing, please reference that number when you inquire.
We provide estimates and quotes by email to make the process faster, safer, and paperless.
What can YOU do?
Please conduct as much business as possible via emails, messaging, and phones. When you see our staff and crews on-site, please practice “social distancing.”
Call, message, or email us with any questions.
Thank you for allowing us to work with you safely.
Let’s all stay safe!
Dec 1, 2020
How to Flush a PWC engine.
PWC Adventures
After a day of use, all personal watercraft (PWC) should be flushed, especially if used in silty or sandy areas. Flushing debris from the engine cooling system and exhaust will help prevent internal corrosion and keep those critical cooling passages running clear. Your PWC will be ready for operation when you are.
You want to continue to enjoy your PWC for years to come – Right?
Here’s how to flush a PWC engine.
Follow these 12 steps for flushing and cleaning a PWC.
This information is limited to an overview only. Remember, always find and follow the instructions for your model before flushing for the first time.
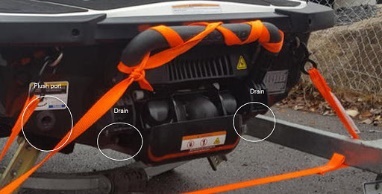
SeaDoo PWC Drain locations
- Locate the flush port(s). You will generally find flush ports on the transom or under the seat. It depends on your model.
- Attach the garden hose to the flush-fitting, but do not start the flow of water. That’s very important!
- Follow your owner’s manual. It may instruct you to idle for 90 seconds to 3 minutes.
- Idle the engine but do not rev the engine. Start the flow of water. Starting the water flow before starting the engine could result in water flowing into the engine through the exhaust system.
- After flushing, turn the water off and disconnect the hose. Now shut down the engine.
- Replace the plug.
Caution
Once done flushing, remember to turn the water off first. Some brands may instruct you to spike the throttle a few times before shutting down the engine to clear water from the exhaust.
Follow Your PWC Owner’s Manual.
These are general instructions. For flushing instructions specific to your model, consult the owner’s manual maintenance section. Can’t find the manual? Check the manufacturer’s website or visit the dealer.
On models with a closed cooling system (most late-model Sea-Doo PWCs), flush only the exhaust.
For other brands and models, flush the exhaust and the engine cooling passages. See the manual for details.
Follow the flushing instructions for your particular brand.
Failure to follow instructions may allow water to get into the engine, leading to corrosion and repairs.
You can flush the PWC while it is on a trailer or a lift, but it must be out of the water.
Want to clean the PWC further?
Find the flush port. Most brands have a flush port on the back of the hull. An alternative is under the seat or in the engine compartment. Check your owner’s manual for the proper location. Some flush ports accept the male end of a garden hose. Others use a snap-in adaptor that screws onto the garden hose. The adaptor would have been supplied with the PWC when it was new. If you don’t have any required adaptors for your model, you can get one from a dealer.
Now it’s time to clean the engine bay.
1. Remove the seat sections and any covers under it to see the engine.
2. Make sure the engine has cooled. Never rinse a hot engine.
3. Raise the bow of the PWC. Remove the drain plug from the hull so that rinse water can exit.
4. Using your water hose, rinse the cooled engine area and the bilge. It’s OK to use your thumb to make a spray of water. Don’t use a nozzle that puts out a lot of pressure. NEVER USE A PRESSURE WASHER. Too much water pressure can force water past the seals on electrical connectors.
5. Use an old towel or rags to wipe off all excess water from areas you can reach.
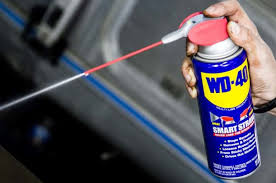
6. Spray down the engine components with a water-displacing lubricant (PWC dealers offer these or simply use WD-40). The oil will displace water left behind and leave a thin, anti-corrosive film.
How to store a PWC.
Store the PWC with the seat off to let the engine compartment dry completely. You can leave the bow up to facilitate draining. Remember to replace the drain plug before using the unit again. Leave yourself a reminder, like a cloth tied to the handlebar.
Conclusion
PWS has the answers for many of your dock, lift, and boating questions
Call Jerry at Pier & Waterfront Solutions (920-493-4404) for more information.
Where is Pier & Waterfront Solutions?
Located at 7325 St. Hwy 57, it’s 3 miles south of Sturgeon Bay and 1 mile past the intersection of Cty MM (heading north). Look on the right at the intersection of Idlewild Road and Hwy 57.
ARE WE OPEN?
Pier & Waterfront Solutions remains “open.”
We have implemented measures to guard the safety of our employees and visitors. At the same time, we are working to maintain the trusted service you expect.
Please use face masks
PWS is conducting as much business as possible by email, text, or phone.
Site visits continue as usual. When in-person contacts are necessary, we follow “social distancing” guidelines as closely as possible.
Our display yard is OPEN
Our display yard is always open for you to examine at your leisure. All displays available for sale have a numbered, red tag on them. If you want more information or pricing, please reference that number when you call.
We provide estimates by email to make the process paperless, faster, and safer. Let’s get back to normal quickly.
What can YOU do to help us?
Please conduct as much business as possible via emails, messaging, and phone. When you see our crews on-site, please practice “social distancing.”
Call, message, or email us with any questions.
Thank you for allowing us to work with you safely.
Let’s all stay safe!
May 28, 2020
Is Your Pier Missing a Dock Storage Box?
Is a Dock Storage Box on your summer shopping list? How many times do you walk to your pier, only to kick yourself because you wish you had a storage box? Do you always forget something? Every time you set foot on your dock, do you think of all the equipment you could store in it? Where do you store the life preservers? Wouldn’t a dock storage box be convenient?
What Makes A Great Storage Box?
Unsure of what to look for in a storage or dock box? Are you afraid to purchase one because you don’t know enough about them? Read on to find helpful info about storage boxes. They will make life much easier for you.
Does the Storage Box Have Tight Fits?
Water Laser Cutting Technology, used on the best dock storage boxes, ensures the best fit. This process offers a consistent, precision cut for all the various pieces. This precision makes for a superior fit. Precision cuts and quality hinges fit together better. The box is less likely to suffer from leaks or damage.
Additionally, these dock storage boxes constructed from fiberglass provide a far superior product.
What’s The Alternative?
The alternative, polyethylene (plastic) storage boxes, fade, discolor, and warp in sunlight. As a result, this depreciates its usage and aesthetic value.
Fiberglass dock storage boxes also come with a gel-coat finish to add an extra layer of protection. Like polyethylene dock boxes, the gel-coat finish will oxidize in sunlight. So what’s the difference then? The difference is, you can buff and wax the oxidation off of the box to keep it looking brand new, year after year.
Buffing and waxing increase the durability of the box in the form of scrape and cut resistance. You can buff and wax any imperfections with a rubbing compound and watch them disappear. The process is like cleaning the hull of a boat on a smaller scale.
Do Polyethlene Dock Storage Boxes Have Gel-Coating?
Polyethylene dock storage boxes do not have a gel-coat finish. Once the sun damages the plastic material, it’s impossible to restore the surface to a like-new finish again.
The failure of the polyethylene storage boxes to withstand the sun will cause you to consider buying a new dock box. This type of failure will happen much sooner with a Polyethylene box than if you had chosen a fiberglass dock box initially.
Choose quality first to save time and money.
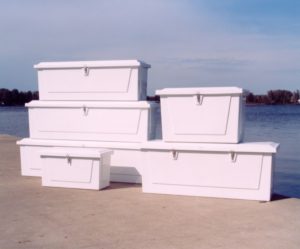
Assorted Dock storage Box sizes
Dock storage boxes come in many sizes including:
98″ x 22″ x 24.5″ H 85″ x 22″ x 24.5″
72″ x 26.5″ x 27.5″ 74″ x 38″ x 36″
71″ x 22″ x 24.5″ 33″ x 24″ x 18″
44.5″ x 26.5″ x 27.5″ 39.5″ x 19.75″ x 21.5″
Triangular and Low profile versions are also avaiable. Call for more information.
Not enough room to mount a dock box on your dock?
PWS has alternatives including, side mounts, for the boxes.
NEW – this year!
This year PWS has another alternative that was not available in the past. Talk to Jerry about trading your dock for the new 3-Season Pier, which we are now offering.
This new steel dock can handle storms better due to it’s higher weight and the “open” decking we use. Combining these two features makes it the heaviest pier on Green Bay. It has survived installations on Lake Michigan also.
An additional feature is the 4′ x 10′ “L,” which is standard on the 3-Season dock. This allows 16 sq feet more than lesser docks. It makes it easier to mount a dock box, enter a boat lift, and entertain your friends.
Tell Your Friends & Family
Have friends or neighbors you believe should see this article? Email them this link – and Thank you!
Don’t Forget – Considering rip-rap for your shoreline? PWS is the place to contact!
Where is Pier & Waterfront Solutions?
Located at 7325 St. Hwy 57, it’s 3 miles south of Sturgeon Bay, and 1 mile past the intersection of Cty MM (heading north). Look on the right side, one mile north, at the next intersection (Idlewild Road and Hwy 57).
ARE WE OPEN?
During this time of uncertainty, Pier & Waterfront Solutions is staying “open.” We have implemented measures to ensure the safety of our employees and visitors. At the same time, we are working to maintain the trusted service that you have come to expect.
We are implementing these precautionary measures:
1. Conducting as much business as possible by email, text, or phone.
2. Site visits will continue but with limited in-person meetings. When in-person contacts are necessary, we will follow “social distancing” guidelines.
3. Our display yard is always open for you to examine at your leisure. All displays have a numbered, red tag on them. If you want more information or pricing, please reference that number.
Is there More?
4. Some employees will be working remotely, but they are always available by phone.
5. Any employee with symptoms or illness is sent home.
6. We continue to provide estimates and invoices by email to make the process paperless.
7. Crew starting times are being staggered to limit social interactions.
8. We keep the same crews together to limit cross interactions.
With these measures, we hope everyone will stay safe, and we will be back to normal operations soon.
What can you do to help us?
1. Please conduct as much business as possible via emails, messaging, and emails. This step protects everyone involved.
2. When you see our crews installing equipment, please practice “social distancing.”
Thank you for allowing us to work with you.
So – YES – ARE WE OPEN?
Please call, message, or email us with any questions.
Let’s all stay safe!
Contact:
Jerry @ (920) 493-4404 or Jerry@wisconsinpws.com – Commercial work & new/used Sales.
Dave @ (920) 905-2588 or Dave@wisconsinpws.com – Erosion control & shoreline work.
Jerry @ (920) 493-4404 or Jerry@wisconsinpws.com – Scheduling & Service work
May 7, 2020
17 STEPS TO PREPARE FOR SUMMER
Summer is almost here. Are you Ready?
Summer activities officially start with Memorial Day. In 2020 this may be delayed for many people. Even so, it’s approaching fast.
Memorial Day means a lot of outdoor activities will be starting. Many people will head to the lake for fun and relaxation. To truly enjoy the rest of the season, you have to ask yourself, “Is my place ready for summer”?
Many people have time on their hands this year, so why not use it to get ready for summer? That way, you can enjoy getting outside and have some real fun on the water.
Be Ready for Summer Activities
Here’s a quick checklist to help make sure you are ready for the season. Many people have time on your hands this year, so why not use it to get ready for summer?
Summer Startup Checklist:
- Have your air conditioner checked and serviced if needed.
- Inspect, sweep, and power wash your decking & porch. For more information – see link.
- Touch up stains and paints as needed.
- Prep your lawn. You may need to give the yard a thorough mowing.
- Rake up any leftover leaves and debris so that a lush green grass can thrive.
- Get out the rake and clean up any debris on your shore. Watch for glass and sharp objects that washed up over the winter. They can completely take the fun out of your summer.
- Clean the grill, fill the propane tanks, or stock up on charcoal and lighter fluid. You want to make sure you have everything ready for that first barbeque.
- Test all smoke and carbon monoxide detectors. Test these every six months. If you don’t have detectors or fire extinguishers, be sure to get some. Unlike living in the city, many lakefront communities have only volunteer fire departments. Response times may not be as quick as in the city, and fire only needs time to get totally out of control.
WHAT ELSE NEEDS TO BE DONE?
- If the furnace has not been operating over the winter, now is an excellent time to make sure it is working correctly. You’ll need it for those early morning chills.
- Look over the screens on the windows and doors. Repair any holes or replace them as needed. No one wants to leave an invitation for the bugs to enter the house.
- Clean your boat and PWC and any other “toys.” Check all fluid levels, inspect the hull, test electronics, give it a thorough cleaning.
- Check all anchor ropes. Are they cut or rotting?
- Be sure to check the trailer and lights. Nothing is more aggravating than following a vehicle with faulty lights.
- Have you checked the batteries? Is it time for a new one?
- Be sure to stock the cabinets. Are there snacks, hamburgers, chips, hot dogs, buns, along with beverages and lots of s’mores. They’re great for outdoor grills and campfires.
- Plant new flowers to add more beauty and color to your yard.
- Check your dock and the cables on your jet ski and boat lifts. Have them changed before they go into the water. For more information, follow this link; and
Most important of all …ENJOY A SAFE SUMMER!
Tell Your Friends & Family
Have friends or neighbors you believe should see this article? Email them this link – and Thank you!
Where is Pier & Waterfront Solutions?
Located at 7325 St. Hwy 57, it’s 3 miles south of Sturgeon Bay, and 1 mile past the intersection of Cty MM (heading north). Look on the right side, one mile north, at the next intersection (Idlewild Road and Hwy 57).
ARE WE OPEN?
During this time of uncertainty, Pier & Waterfront Solutions is staying “open.” We have implemented measures to ensure the safety of our employees and visitors. At the same time, we are working to maintain the trusted service that you have come to expect.
We are implementing these precautionary measures:
1. Conducting as much business as possible by email, text, or phone.
2. Site visits will continue but with limited in-person meetings. When in-person contacts are necessary, we will follow “social distancing” guidelines.
3. Our display yard is always open for you to examine at your leisure. All displays have a numbered, red tag on them. If you want more information or pricing, please reference that number.
Is there More?
4. Some employees will be working remotely, but they are always available by phone.
5. Any employee with symptoms or illness is sent home.
6. We continue to provide estimates and invoices by email to make the process paperless.
7. Crew starting times are being staggered to limit social interactions.
8. We keep the same crews together to limit cross interactions.
With these measures, we hope everyone will stay safe, and we will be back to normal operations soon.
What can you do to help us?
1. Please conduct as much business as possible via emails, messaging, and emails. This step protects everyone involved.
2. When you see our crews installing equipment, please practice “social distancing.”
Thank you for allowing us to work with you.
So – YES – WE ARE OPEN?
Please call, message, or email us with any questions.
Let’s all stay safe!
Contact:
Jerry @ (920) 493-4404 or Jerry@wisconsinpws.com – Commercial work & new/used Sales.
Dave @ (920) 905-2588 or Dave@wisconsinpws.com – Erosion control & shoreline work.
John @ (920) 493-4405 or John@wisconsinpws.com – Scheduling & Service work
Aug 20, 2019
Cable Maintenance
In last weeks article, (https://wisconsinpws.com/boat-lift-cable/) we discussed why your boat lift cable would not last forever.
This week we get into more detail and explain what you can do. We discuss the most critical causes of cable problems and what you can do to protect them.
There are two types of cable material used for boat lifts:
- Galvanized; and
- Stainless steel.

Rust on galvanized cable
Galvanized Steel is made of carbon steel which on its own is not resistant to rust. It is made corrosion resistant by running the cable through a hot bath of molten zinc. As long as the coating is on the wire “fibers,” it will resist the formation of rust.
Stainless Steel is also made of carbon steel. However, when mixed with about 10% chromium, it will form a stainless steel cable. It resists oxidation or corrosion. The chromium in the steel forms a layer of chromium oxide that promotes resistance to corrosion.
When the stainless steel wire is exposed to oxygen, the protective coating will REGENERATE. The anti-corrosion protection of the chromium maintains the resistance of the steel to rust.
Galvanized steel is less expensive than stainless steel due to the differences in the processing of each. Galvanized steel is durable, and each cable is sized to handle the loads created by your boat lift.
No – you can NOT increase the boat lift rating by merely increasing the size of the cable used. If you simply increase the diameter of the cable, you must also increase the size of the drum, or you risk early failure. The larger wire is stiffer and cannot bend around a smaller drum without damage.
Keep this information in mind if a neighbor or visitor wants to put their boat on your lift when it is empty. Know the weight of the new boat.
See https://wisconsinpws.com/boat-lift-calculations-part-4/ for additional information about cable maintenance.
Boat Positioning
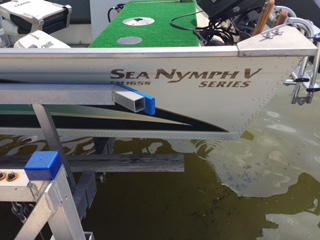
Boat stern overhanging too far
Make sure your boat is positioned correctly on the lift. If it’s not far enough forward, it will put excessive weight on the rear cables and the frame structure. On the other hand, if the boat is too far forward, you may damage the lower motor assembly or break the front cables due to excess weight.
In general, a boat has most of its weight at the stern where the motor is. As a result, to maintain proper balance on your lift, the boat stern should be about 6″ to12″ from the lift rack. See the above article for more information.
When properly balanced, the weight is evenly distributed across the lift rack. A balanced boat prevents overloading one end of the lift.
Note – unusually long boats, may be an exception to the 6-12″ rule. You must be especially careful to find the proper balance. Proper balance will minimize potential damage to the cables.
To summarize, take care of your cables, and they will last for years.
What Cable Maintenance Can I do by myself?
1. Make a visual inspection of the cables regularly. It is helpful to do this when the lift rack is in its lowest position to expose more cable. Look for chafing, corrosion or a flat cable especially near the winch box.
Don’t forget – do this inspection with leather gloves on to protect your hands.
Boat Lift Cable Lubricant
2. At the beginning of the boating season, be sure to apply a burst of penetrating oil to the top of the cables around the winch drum. The penetrating oil will work its way down the wires as needed. Raise the rack halfway up and carefully apply another burst of penetrating oil to the winch drum. NEVER use grease on the cables. It traps moisture inside the strands. Do not be afraid to do it more often during the summer months, if you use the boatlift frequently.
Most quality lifts use Stainless Steel cables for a majority of cables and (1) galvanized cable as the main winch cable.
3. Watch the winch drum to ensure that the cable is wrapping smoothly on the drum.
Stainless steel lift cables also benefit from penetrating oil. We recommend this procedure in Spring, halfway through the boating season and again in Fall after removal.
To summarize, take care of your cables, and they may last for years. Remember, the cables and the winch do all the “work” on your lift. They do the lifting by raising the rack assembly with the weight of the watercraft on it. That’s a lot of weight so the cables must be well maintained.
In Conclusion
In Spring and Fall (and at least once during the summer months), put a short blast or two of PENETRATING oil on the cables wrapped around the winch drum from the top of the winch. Do not soak the wire until it drips when in the water. You don’t want to contaminate the water. Use only penetrating oil as the lubricant.
NEVER use grease (it traps the moisture inside the cable accelerating its deterioration).
Cable maintenance begins with inspecting cables for frays and rust – Caution – wear leather gloves to prevent injury to your hands. Check near the top of the winch cable as this is the most common area for frays. Replace as needed, if corrosion is present.
Check the alignment of all cables on the pulleys. Simply follow the cables down until they wrap around a pulley. Are they On a pulley or is the cable off to one side? Call PWS if they are.
With your watercraft on the rack – check for any slack in the cables. All cables should be equal in tension. Contact PWS for adjustment, if needed.
Look for cable corrosion near the winch with the rack fully down (but without slack in the lifting cables.
Remember, the cables and the winch do all the “work” on your lift. They do the lifting by raising the rack assembly with the weight of the watercraft on it. That’s a lot of weight so the cables must be well maintained.
Remember
Pier & Waterfront Solutions (PWS) specializes in all ShoreMaster docks, lifts, and accessories.
We are located in the center of Door County at 7325 St Hwy 57, just south of Sturgeon Bay at the intersection with Idlewild Road. Our staff looks forward to serving all of your waterfront needs.
Call Jerry at 920-493-4404 or Email Jerry@wisconsinpws.com for more information.